A detailed guide on how to use boot repair disk utility to fix GRUB issues in Ubuntu and other Linux distributions.
GRUB, or the Grand Unified Bootloader, is the program that is responsible for loading your operating system when you start your computer. If GRUB is damaged or corrupted, you may not be able to boot your computer. It’s a difficult situation that can be frustrating for many users.
The boot repair disk (Boot-Repair-Disk) is a free and open-source tool that can help you repair GRUB and other boot problems. It is a standalone LIVE Linux distribution which comes as an ISO file. You can keep it handy by making a bootable USB or CD using this. And repair GRUB or perform various system maintenance.
The latest version of the boot repair disk uses Linux Mint as the base ISO with pre-loaded applications to repair GRUB boot issues. Earlier, it used to have the LXQt-based distribution.
In this tutorial, I will walk you through how to repair an example corrupted GRUB.
Table of Contents
Boot repair disk: Tutorial
Download and prepare USB
- Firstly, you need a USB stick (minimum 4 GB), which should be used to create the LIVE medium.
- If your current system is not bootable, you need to get help from any other working system to create the bootable disk.
- Download the ISO file (~2.6GB) from this page.
- You can use the Etcher utility to create a bootable disk. This is available for both Windows and Linux. You can follow this guide. Alternatively, you can use your Linux distribution’s image writer tool to do it.
- Once the USB stick is ready, plug it in and press F2 (or any other key) to go to BIOS. Make sure to change the boot priority to the USB stick and restart.
Repair GRUB
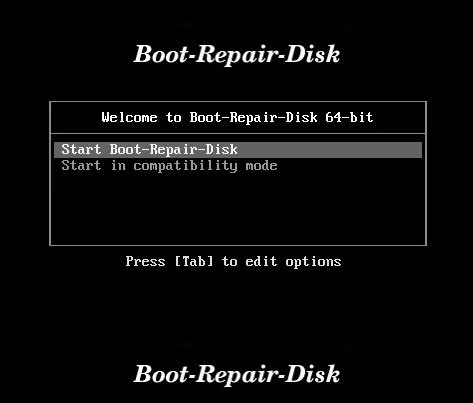
- You should see the boot repair disk menu if the disk is detected. Select “start boot repair disk” from the boot menu and wait for the LIVE system.
- The LIVE system will prompt you to connect to the internet. Say NO. The boot repair application will launch automatically.
- It will scan your current system (including EFI) and all the operating systems & partitions.
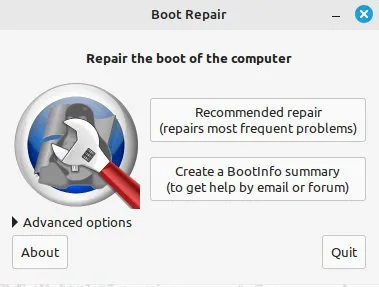
- Finally, it will show you the main window. Select “recommended repair”.
- The recommended repair should work in most of the boot failure cases. For advanced options, you can further explore. But I would suggest you choose the recommended option.
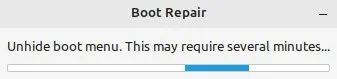
- Once you do that, the application will try to fix the GRUB by processing several steps by itself. So, wait.
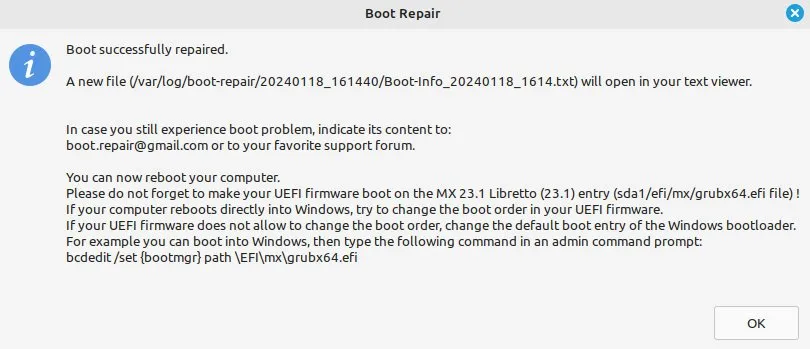
- Once everything is complete, you should see a message that the boot has been repaired successfully.
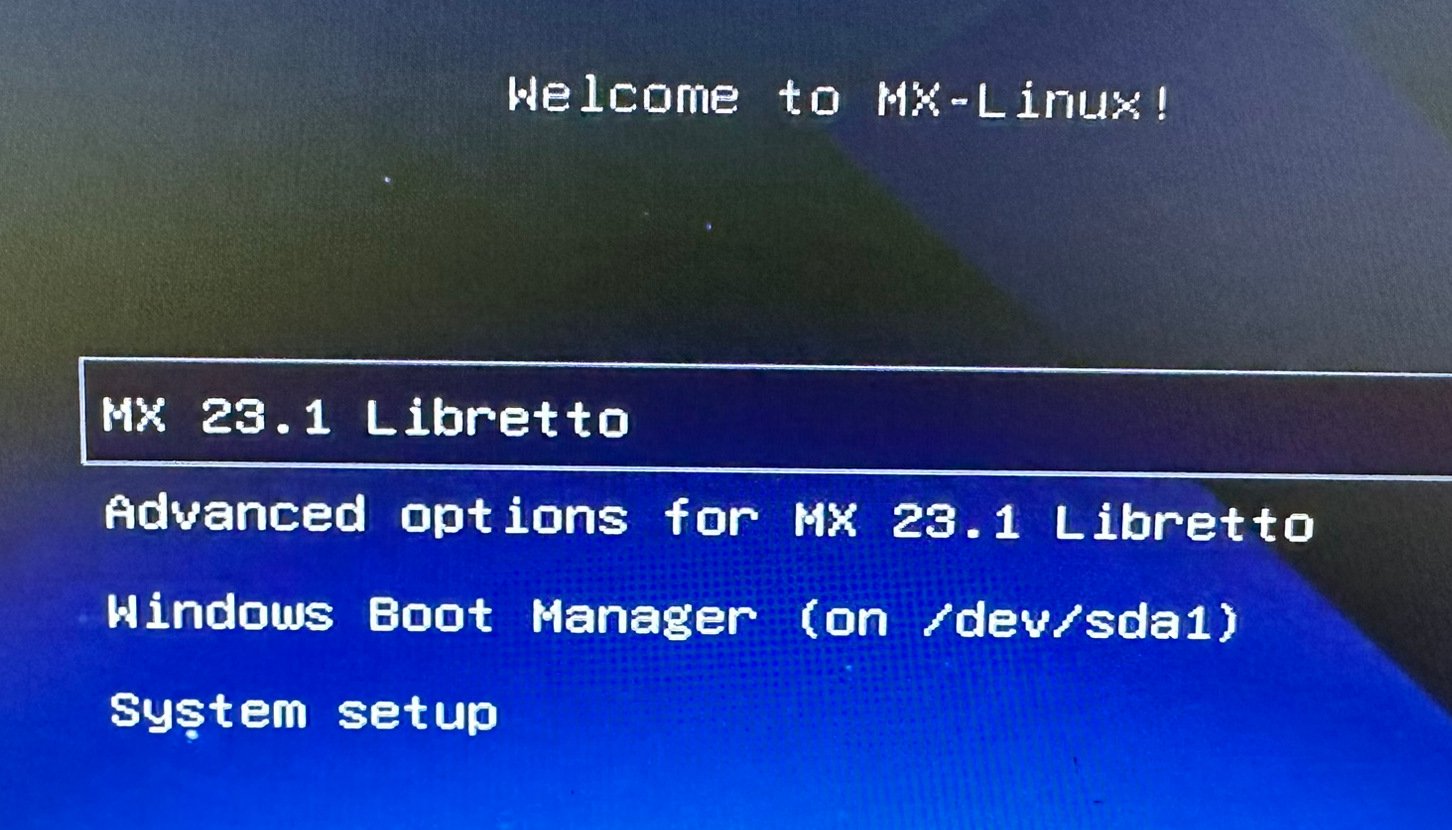
- You can now restart the current LIVE system and remove the LIVE USB when prompted. After restart, you should see the GRUB with all the operating systems available in your system.
- In addition, you also get a text file with the entire report. You can use this for further troubleshooting or get help from the online forum. The file is located at
/var/log/boot-repairwith a date/time folder.
Example
Here’s the example log file from my test system (which had a corrupted boot). This is for your reference.
Recommended repair: ____________________________________________________________

The default repair of the Boot-Repair utility will reinstall the grub-efi of
sda5,
using the following options:  sda1/boot/efi
Additional repair will be performed: unhide-bootmenu-10s use-standard-efi-file restore-efi-backups


rm /mnt/boot-sav/sda1/efi/Boot/bootx64.efi
mv /mnt/boot-sav/sda1/efi/Boot/bkpbootx64.efi /mnt/boot-sav/sda1/efi/Boot/bootx64.efi
Mount /dev/sda1 on /mnt/boot-sav/sda5/boot/efi

===================== Reinstall the grub-efi of /dev/sda5 ======================

chroot /mnt/boot-sav/sda5 grub-install --version
grub-install (GRUB) 2.06-13+deb12u1
modprobe: FATAL: Module efivars not found in directory /lib/modules/5.15.0-76-generic
chroot /mnt/boot-sav/sda5 modprobe efivars

chroot /mnt/boot-sav/sda5 efibootmgr -v before grub install
BootCurrent: 0000
Timeout: 0 seconds
BootOrder: 0000,0006,0005,0003,0004,2003,2001,2002
Boot0000* Linpus lite	HD(1,MBR,0x14eb2669,0x23c,0x2130)/File(EFIBootgrubx64.efi)RC
Boot0001* EFI Network 0 for IPv4 (E8-6A-64-93-7E-27) 	PciRoot(0x0)/Pci(0x1c,0x0)/Pci(0x0,0x0)/MAC(e86a64937e27,0)/IPv4(0.0.0.00.0.0.0,0,0)RC
Boot0002* EFI Network 0 for IPv6 (E8-6A-64-93-7E-27) 	PciRoot(0x0)/Pci(0x1c,0x0)/Pci(0x0,0x0)/MAC(e86a64937e27,0)/IPv6([::]:<->[::]:,0,0)RC
Boot0003* ubuntu	HD(1,GPT,3f85cbae-2f87-4177-9dc1-eef5e5e29a7f,0x800,0x82000)/File(EFIubuntushimx64.efi)
Boot0004* Windows Boot Manager	HD(1,GPT,3f85cbae-2f87-4177-9dc1-eef5e5e29a7f,0x800,0x82000)/File(EFIMicrosoftBootbootmgfw.efi)WINDOWS.........x...B.C.D.O.B.J.E.C.T.=.{.9.d.e.a.8.6.2.c.-.5.c.d.d.-.4.e.7.0.-.a.c.c.1.-.f.3.2.b.3.4.4.d.4.7.9.5.}...O................
Boot0005* debian	HD(1,GPT,3f85cbae-2f87-4177-9dc1-eef5e5e29a7f,0x800,0x82000)/File(EFIdebianshimx64.efi)
Boot0006* mx	HD(1,GPT,3f85cbae-2f87-4177-9dc1-eef5e5e29a7f,0x800,0x82000)/File(EFImxgrubx64.efi)
Boot2001* EFI USB Device	RC
Boot2002* EFI DVD/CDROM	RC
Boot2003* EFI Network	RC

chroot /mnt/boot-sav/sda5 uname -r
5.15.0-76-generic

chroot /mnt/boot-sav/sda5 grub-install --efi-directory=/boot/efi --target=x86_64-efi
Installing for x86_64-efi platform.
Installation finished. No error reported.
df /dev/sda1
mv /mnt/boot-sav/sda5/boot/efi/EFI/Boot/bootx64.efi /mnt/boot-sav/sda5/boot/efi/EFI/Boot/bkpbootx64.efi
cp /mnt/boot-sav/sda5/boot/efi/efi/mx/grubx64.efi /mnt/boot-sav/sda5/boot/efi/EFI/Boot/bootx64.efi

chroot /mnt/boot-sav/sda5 grub-install --efi-directory=/boot/efi --target=x86_64-efi
Installing for x86_64-efi platform.
Installation finished. No error reported.

chroot /mnt/boot-sav/sda5 efibootmgr -v after grub install
BootCurrent: 0000
Timeout: 0 seconds
BootOrder: 0006,0000,0005,0003,0004,2003,2001,2002
Boot0000* Linpus lite	HD(1,MBR,0x14eb2669,0x23c,0x2130)/File(EFIBootgrubx64.efi)RC
Boot0001* EFI Network 0 for IPv4 (E8-6A-64-93-7E-27) 	PciRoot(0x0)/Pci(0x1c,0x0)/Pci(0x0,0x0)/MAC(e86a64937e27,0)/IPv4(0.0.0.00.0.0.0,0,0)RC
Boot0002* EFI Network 0 for IPv6 (E8-6A-64-93-7E-27) 	PciRoot(0x0)/Pci(0x1c,0x0)/Pci(0x0,0x0)/MAC(e86a64937e27,0)/IPv6([::]:<->[::]:,0,0)RC
Boot0003* ubuntu	HD(1,GPT,3f85cbae-2f87-4177-9dc1-eef5e5e29a7f,0x800,0x82000)/File(EFIubuntushimx64.efi)
Boot0004* Windows Boot Manager	HD(1,GPT,3f85cbae-2f87-4177-9dc1-eef5e5e29a7f,0x800,0x82000)/File(EFIMicrosoftBootbootmgfw.efi)WINDOWS.........x...B.C.D.O.B.J.E.C.T.=.{.9.d.e.a.8.6.2.c.-.5.c.d.d.-.4.e.7.0.-.a.c.c.1.-.f.3.2.b.3.4.4.d.4.7.9.5.}...O................
Boot0005* debian	HD(1,GPT,3f85cbae-2f87-4177-9dc1-eef5e5e29a7f,0x800,0x82000)/File(EFIdebianshimx64.efi)
Boot0006* mx	HD(1,GPT,3f85cbae-2f87-4177-9dc1-eef5e5e29a7f,0x800,0x82000)/File(EFImxgrubx64.efi)
Boot2001* EFI USB Device	RC
Boot2002* EFI DVD/CDROM	RC
Boot2003* EFI Network	RC

chroot /mnt/boot-sav/sda5 update-grub
Found theme: /boot/grub/themes/mx_linux/theme.txt
Found linux image: /boot/vmlinuz-6.1.0-13-amd64
Found initrd image: /boot/initrd.img-6.1.0-13-amd64
grub-probe: error: cannot find a GRUB drive for /dev/sdb1.  Check your device.map.
Found Windows Boot Manager on /dev/sda1@/EFI/Microsoft/Boot/bootmgfw.efi
Adding boot menu entry for EFI firmware configuration

Unhide GRUB boot menu in sda5/boot/grub/grub.cfg

Boot successfully repaired.

You can now reboot your computer.
Please do not forget to make your UEFI firmware boot on the MX 23.1 Libretto (23.1) entry (sda1/efi/mx/grubx64.efi file) !
If your computer reboots directly into Windows, try to change the boot order in your UEFI firmware.
If your UEFI firmware does not allow to change the boot order, change the default boot entry of the Windows bootloader.
For example you can boot into Windows, then type the following command in an admin command prompt:
bcdedit /set {bootmgr} path \EFI\mx\grubx64.efi
Closing notes
I hope this guide helps you repair GRUB and boot into your OS successfully. This is one of the best free and open-source utilities available, and you should always keep a USB with boot repair handy.


