A short tutorial for beginners on creating a bootable USB stick in Windows with Ubuntu/Linux ISO images.
A bootable Ubuntu USB is handy for multiple reasons. Suppose you are a Windows user and thinking of migrating to Linux. In that case, you can experience Ubuntu desktop/Linux desktops without hampering your PC configuration or installation using a Live USB stick. Also, using this, you can boot from the USB stick directly from an Internet Cafe or any borrowed computer. Not only that, if you have a broken system, you can always use the USB stick to boot from and repair the broken system/recover data. Here are the steps to follow to create a bootable Ubuntu USB from Microsoft Windows.
What you need
- USB stick or a flash drive with 2 GB or larger space.
- A working system with Microsoft Windows 10 or later.
- Rufus a free and open-source USB stick writing tool. You can download the latest Rufus exe file from the below link and install it on Windows.
- And Ubuntu ISO file/Any Linux flavour which you can download it. It is recommended to try Ubuntu if you are new to Linux. You can download it from here.
Create Bootable USB on Windows – Steps
- Launch Rufus and Insert your USB stick into the Windows system
- In the Rufus main window, from the Drive drop-down, select your USB stick drive.
- In the Boot Selection drop-down, select Disk Or ISO Image and then click the Select button.
- Choose the ISO file of Ubuntu/Linux which you have downloaded.

- Choose the partition scheme as MBR, and select BIOS or UEFI from the target system drop-down.
- Leave all other options, like format options, file system, cluster size etc, as default values – don’t change anything.
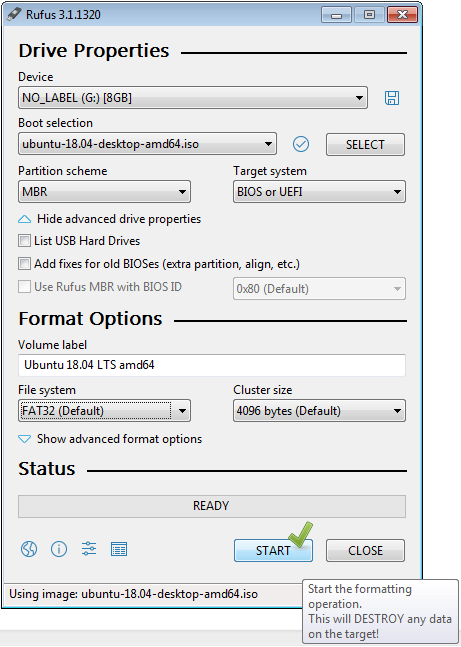
- If you’re all set, click Start.
- A popup may come up with options for choosing which mode to operate.
- Ubuntu ISO images are ISO Hybrid images which means they can be written as ISO image mode as well as the disk image mode.
- Choose the Recommended Write in ISO Image Mode and click OK.

- The next popup will give you a warning that all the data on the USB will be erased. So double-check whether you have selected the correct drive or USB stick.
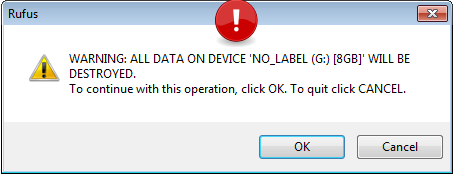
- Press OK to start and wait till Rufus finishes writing the disk.

After completion, you can open My Computer and check the ISO image data written on the USB Stick.

Now you can boot from this USB stick and enjoy Ubuntu without installing it.
Summary
If you are new to the Linux world, you can use a USB stick using the above method and give Ubuntu/Linux a try without installing it on your PC.
Drop a comment if you have any questions.
This tutorial is filed under boot tips.


