This article features four quick ways to fix the everlasting Laptop brightness problem in Ubuntu.
Ubuntu plus most of the Linux distributions always had issues with Laptop brightness. The default hardware controllers never in the Laptop keyboard worked most of the time after a fresh install.


Follow the below definite steps that worked till now for most laptops based on feedback on this website at our old article.
The described methods worked for the below models (so far). For the complete list of Laptops/Desktops where either of these four methods worked, refer to the list at the bottom of this article.
- ASUS G75-VW
- Dell Vostro 3000 Series
- Samsung RV411 Series
Table of Contents
Fix the Laptop Brightness Problem In Ubuntu
Method 1: Fix Brightness Enabling Laptop Specific Drivers
- Open the file
/etc/default/grubusing gedit or any other text editor.
Find the below line.
GRUB_CMDLINE_LINUX_DEFAULT="quiet splash"
- Change the above line to:
GRUB_CMDLINE_LINUX_DEFAULT="quiet splash acpi_backlight=vendor"

This would ensure to load of device-specific drivers before default drivers in Linux.
- Save the file and close the text editor.
- Open the terminal and run the below command.
update-grub
- Reboot.
After rebooting, try adjusting the brightness using laptop’s dedicated control keys.

Method 2: Fix Brightness Using a Software
If the above method does not work, you could try the below method using an app.
This app named ‘Brightness Controller‘, can control the display using a simple GUI. It supports multiple displays as well.
The app is available in PPA. You can run the below command to install in Ubuntu 18.04 LTS, Ubuntu 20.04 LTS or Ubuntu 22.04 LTS.
sudo add-apt-repository ppa:apandada1/brightness-controller
sudo apt update
sudo apt install brightness-controller
For other download options, you can refer to this page.

After installation, you can find it under the application menu or search for it in the application menu. Once opened, you can see a bar that controls the display brightness, which you can adjust as needed.
Method 3: Fix Brightness by configuring X11
Follow this method if none of the above fixes works. This should be the last resort.
Open a terminal session. Then browse to the X11 config file path /etc/X11/xorg.conf.d
cd /etc/X11/xorg.conf.d
If you do not find any file in the above path, check the below path for the configuration. This is mainly for those systems where you have logged in as a local user and not a root user.
cd /usr/share/X11/xorg.conf.d
Then, list the files via ls. You can see something like this below.
ls
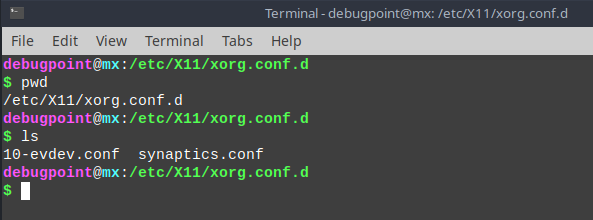
For this example, you can see it has a file named 10-evdev.conf. For your system, it might be different. So open the file via test editor as root.
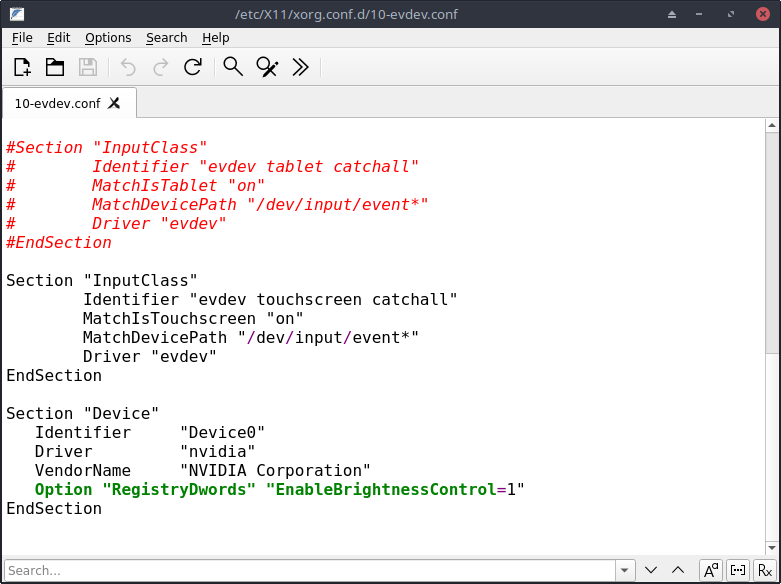
sudo gedit /etc/X11/xorg.conf.d/10-evdev.conf
Add the below lines entirely at the end of this file and save the file.
Section "Device"
Identifier "Device0"
Driver "nvidia"
VendorName "NVIDIA Corporation"
Option "RegistryDwords" "EnableBrightnessControl=1"
EndSection
Sample file below:
Once you are done, restart the system.
You should be able to control the brightness now using the laptop hardware keys.
Method 4: Fix Brightness using xrandr
If none of the above methods gives you hope, try the following method. This uses xrandr’s properties, the official config utility for X server Resize and Rotate.
Open a terminal and find out the name of your display using the below command. In the below screenshot, you can see two outputs because, in my test system, two displays are there.
xrandr | grep " connected" | cut -f1 -d " "
So, the next is to change the brightness using the display name. So, use the following command by changing the monitor name. In this example, I have used eDP-1, my system’s display. The brightness value range is 0 to 1, where 0 is the dimmest and 1 is the brightest.
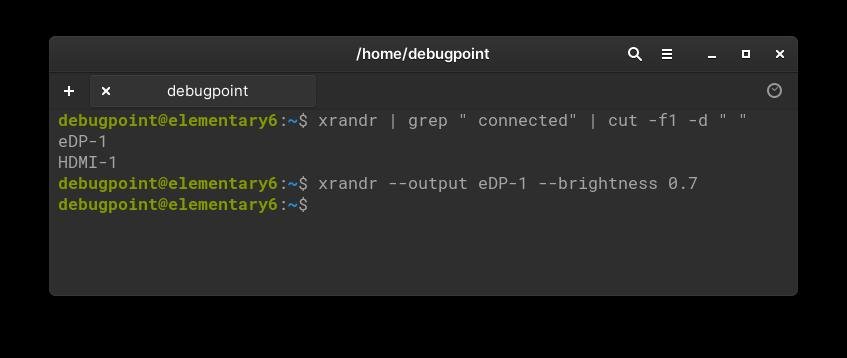
xrandr --output eDP-1 --brightness 0.7
To revert, you can use the above command with brightness=1.
Drop a comment if any of these methods worked for your laptop. Don’t forget to mention your Laptop model for the benefit of others.
The above methods are tested and working well in the below Ubuntu releases:
- Ubuntu 16.04 LTS, Ubuntu 17.10, Ubuntu 18.04 LTS, Ubuntu 19.10, Ubuntu 20.04 LTS, Ubuntu 22.04 LTS, Ubuntu 23.10.
List of hardware (Laptops, Desktops) where either of the above methods worked till now (updated Nov 2023):
- Toshiba C-665
Toshiba Tecra A9-S9016X - Dell Vostro 3000 Series
Dell Latitude E6530
Dell XPS 15 - Samsung RV411 Series
Samsung Notebook NP370R5E - Intel HD4000
Acer Aspire 5810
Lenovo G580
LG P430
HP Pavilion G Series
Gigabyte Aero15 - ASUS G75-VW
- ASUS K52F


