A simple tutorial shows how to install the popular lightweight distribution MX Linux as a standalone system, dual-boot and in VM.
Table of Contents
What is MX Linux?
MX Linux is a Debian-based systemd-free distribution that primarily targets lightweight and older hardware. It became popular recently due to its unique native app tools, stability, active development and a nice community of users & devs. MX Linux currently features Xfce, KDE Plasma and Fluxbox for desktops. The Debian-stable base provides the ultimate stability. Moreover, it also provides a 32-bit installer for that older hardware.
Pre-requisite before installation
- Download any ISO files based on your desired flavour from this link: Download MX Linux
- Once downloaded, create a bootable USB stick using the above ISO file. You can create a bootable USB stick with Etcher or any other utility. Here’s a guide for you: for Linux & for Windows.
- Plugin your USB stick which you have prepared, and reboot. While rebooting, make sure to boot into BIOS. You can boot in by pressing any hardware-specific function key while starting your laptop/desktop. A sample function list is presented below.
| Brand | key to enter into BIOS |
| Lenovo (all laptops excluding thinkpads) | F2 or Fn + F2 |
| Lenovo (Desktops) | F1 |
| Lenovo (ThinkPads) | Enter then F1. |
| Dell | F2 or F12 |
| HP | F10 or F1 or DEL |
| ASRock | F2 or DEL |
| ASUS | F2 for all PCs, F2 or DEL for Motherboards |
| Acer | F2 or DEL |
| ECS | DEL |
| Gigabyte / Aorus | F2 or DEL |
| MSI | DEL for motherboards and PCs |
| Microsoft Surface Tablets | Press and hold volume up button. |
| Origin PC | F2 |
| Samsung | F2 |
| Toshiba | F2 |
| Zotac | DEL |
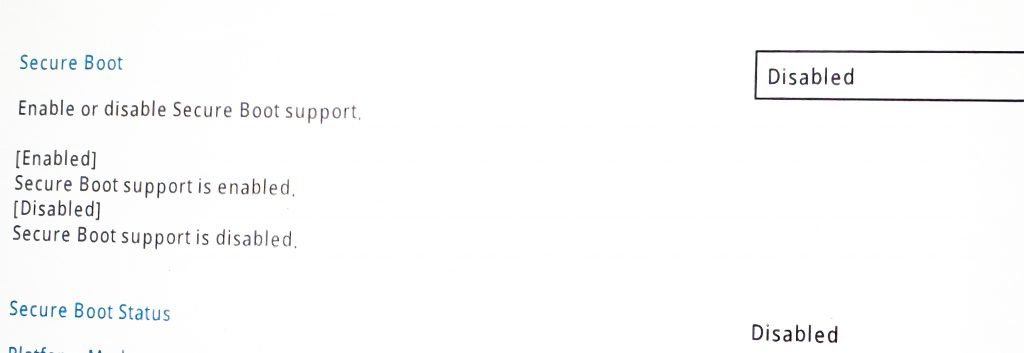
- Once you are into BIOS, do the followings (these screenshots might look different in your system):
- Disable secure boot (if you are making a dual-boot system with Windows)
- Enable USB boot and set the USB stick as the top of your boot priority order.
- Save and exit (F10).
- Optional: If you are installing MX Linux as a dual-boot in a Windows system, then make sure to create a separate partition beforehand.


How to Install MX Linux
MX Linux uses a separate custom installer for its base installation. It’s a little different from other distributions.
Once you boot from the USB stick, you should see the following boot screen. Select the first option and hit enter.

Once you are on the live desktop, you should see an icon for installation. Launch the installer using this. On this screen, you get an option to change the keyboard layout. Hit next once you are okay with the details on this screen.

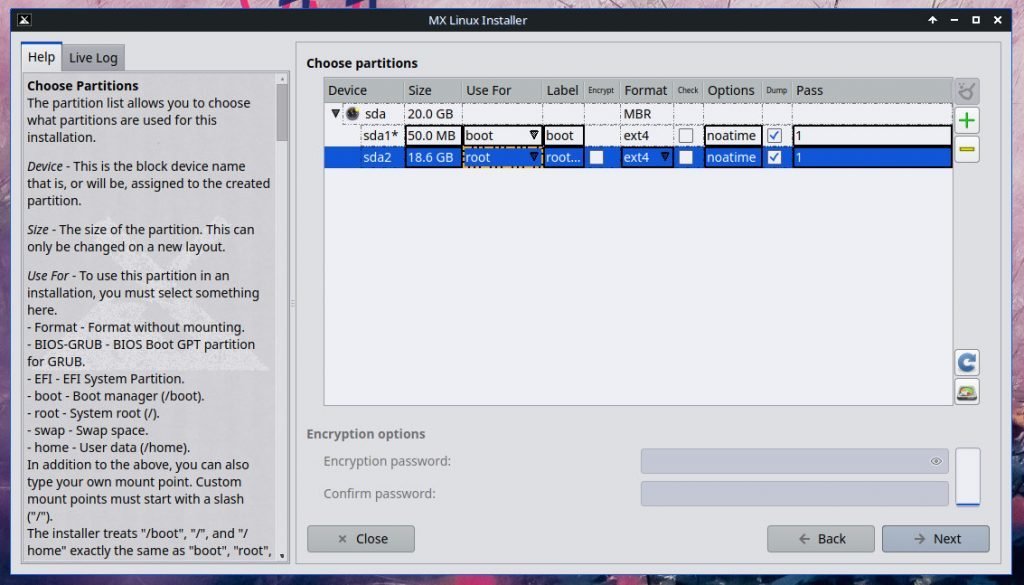
In the first screen, select the “customize disk layout” option. And hit next.

You can add or delete partitions on the next screen using the MX Linux installer. You can select the partition where you want to install MX Linux, set the mount point and proceed. Be careful on this screen since the target root partition will be formatted. At any stage, if you are not sure, you can click Close to Abort the installation.
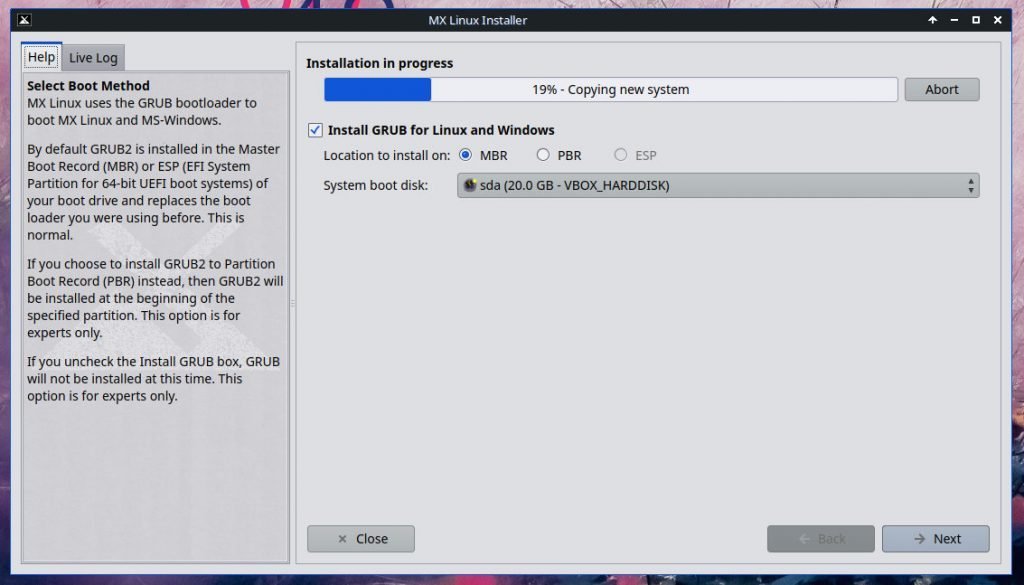
Hit next once you are done with the partition. The installer will start installing the system. However, you can start adding the additional details as the installation progresses.
You can skip adding samba shares, and domains for networks unless needed. And add a user account, set root password.


The above screen is the final screen. Once the installation is complete, you can see the final screen as below.

You can now restart your system and log back in using the ID and password you created above.
And a brand new MX Linux desktop will welcome you.

Wrapping Up
This tutorial explained how to install MX Linux on your Laptop or any hardware. Also, I have mentioned instructions for dual-boot systems as well.
If you face any trouble during installation, drop a note below Or refer to the MX Linux official forum.


