A tutorial on how to Setup Ubuntu as a dual boot in Windows 7.
Can I install Ubuntu on my desktop or laptop without messing with my Windows 7 installation? How the dual boot would work? Do I get to choose the operating system before booting starts? A lot of people wondering about this feasibility. To help those and all, this guide provides a detailed step-by-step process with screenshots to achieve a working dual boot box for Ubuntu and Windows 7.
If you are looking for dual booting of Windows 10 and Ubuntu – read here.
Whether you are on a Laptop or a desktop the below process is the same. This how-to guide is prepared on a low-end desktop keeping in mind all the people who may not have a high-end system available.
So before you start this journey make sure you have these –
a) Ubuntu installation files in a DVD/USB (bootable).
b) A notebook and a pen (really, I mean it 🙂 ).
If you don’t have the disk/USB, go to http://www.ubuntu.com/download/desktop and download your desired distribution version (*.iso image) and burn it to a disk. I choose Ubuntu 14.04.4 LTS for this how-to guide. I would recommend going for always LTS version aka Long Term Support version because it’s stable and you always get periodic updates for the long term. Make sure to choose appropriate architecture while downloading the Ubuntu image (*.iso) from the above link. If your system is using an Intel motherboard, download the x86 image, and if it’s AMD go for the AMD64 image. If you are not sure about your system, in Windows7, go to START => Computer => Right Click => Properties => Processor (under System)
Table of Contents
Step 1:
Open Computer in Windows 7 and note down the drives and their respective sizes.
Typically Windows 7 gets installed in the primary partition (C:\). At the beginning of the Ubuntu installation, the installer needs a partition where Ubuntu would be installed. Choose a partition other than C:\ where your Windows 7 is installed. It could be any of your logical partitions D:, E:, F: etc. (Detailed guides in following steps)
Step 2:
Now, before you proceed to the next step, decide which drive to install Ubuntu and make sure you backup all your data from that drive because Ubuntu installer will format that drive before installation.
Step 3:
Put your Ubuntu installation disk in disk drive/plug in a USB stick and reboot your PC to boot from your disk/USB.
Make sure you have made your disk drive or USB as a first boot device in your BIOS.
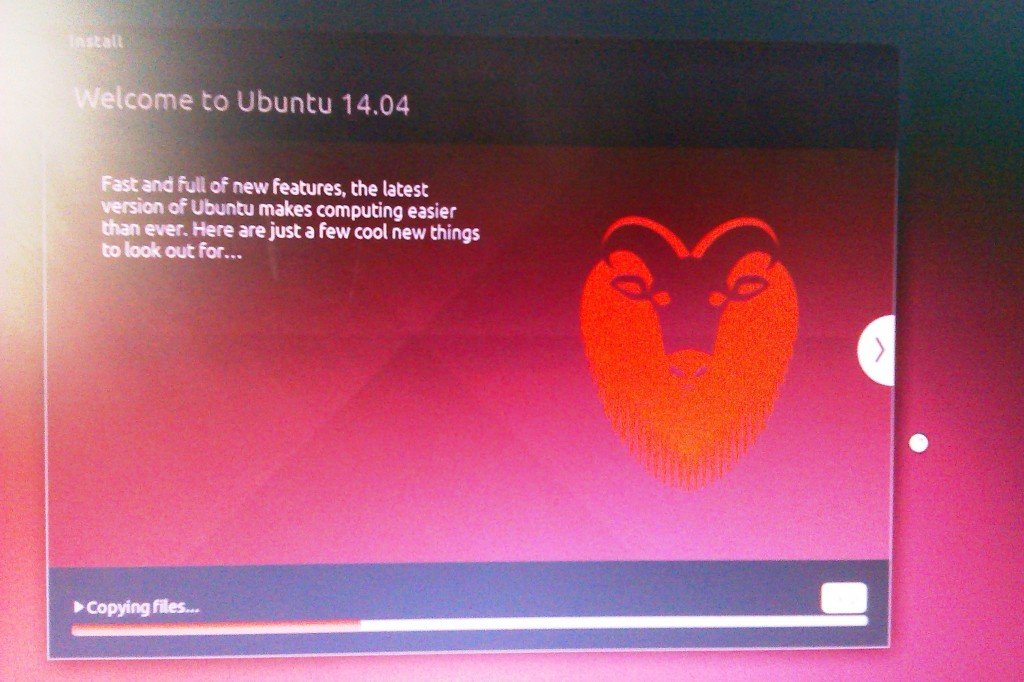
Step 4:
If everything is fine till now, Ubuntu installation should start and you would see a nice Ubuntu logo like this –

Wait for 1 or 2 minutes depending on your system configuration till the installer loads. Once you see the below window, click Install Ubuntu. Let’s go for it.
Step 5:
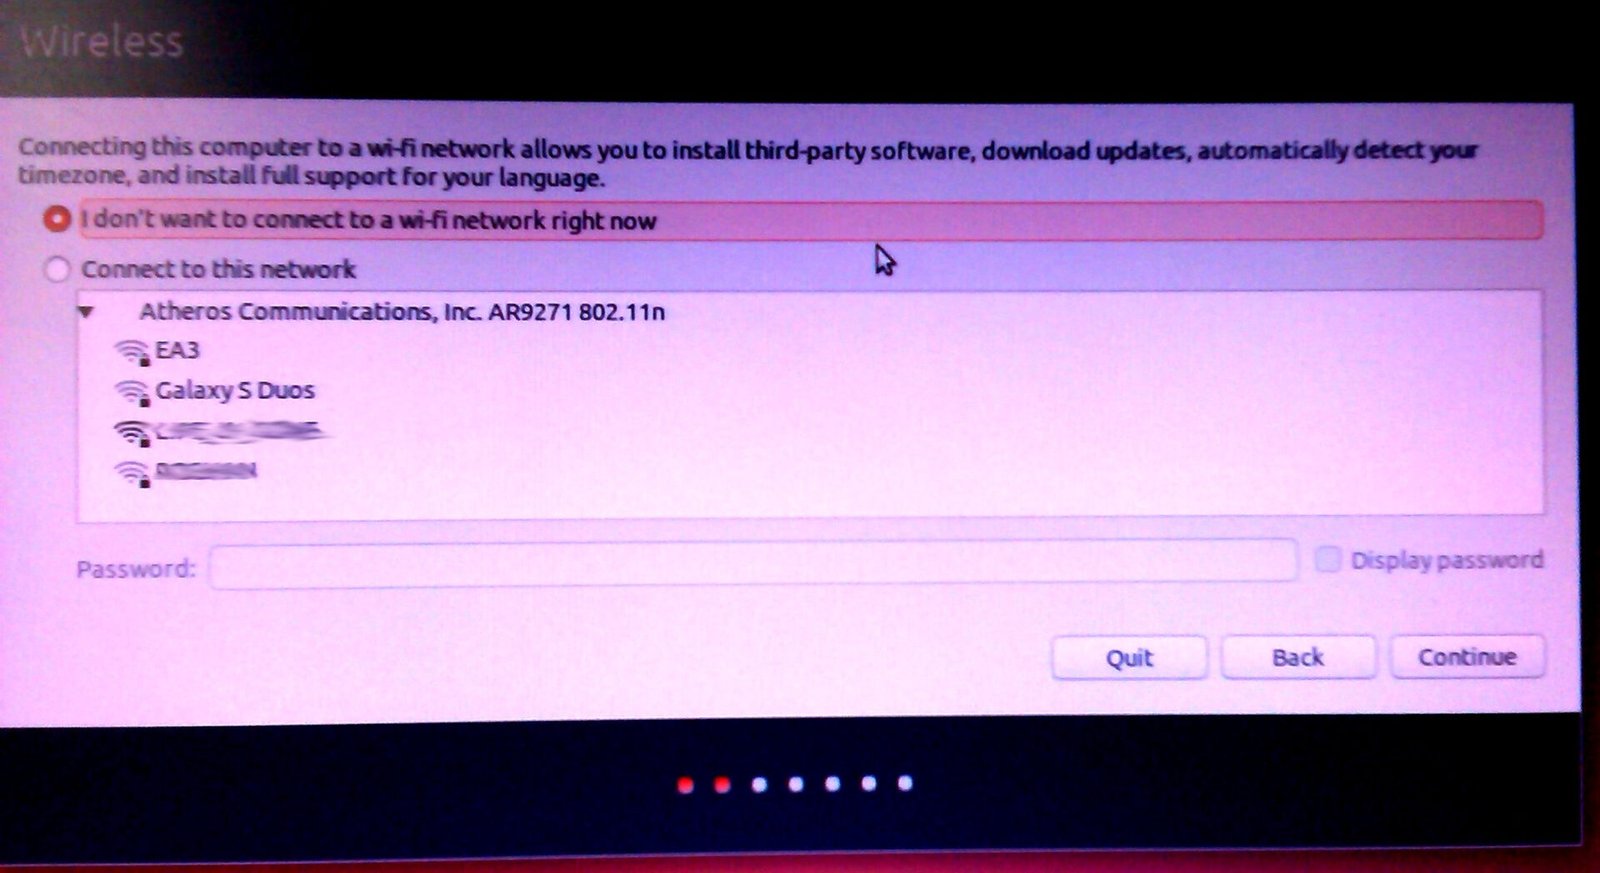
If you have an active INTERNET connection, wifi or wired, the installer itself would try to connect, but I would recommend leaving the INTERNET for now and Press continue on this screen.
Step 6:
In the installation type screen, the installer would find how many OS is installed in your box, and depending on it, it would give you options to choose. Let’s choose the option “Something Else” which would guide you to find out a partition OR create a partition in your HDD (Hard Disk Drive) and start the installation.

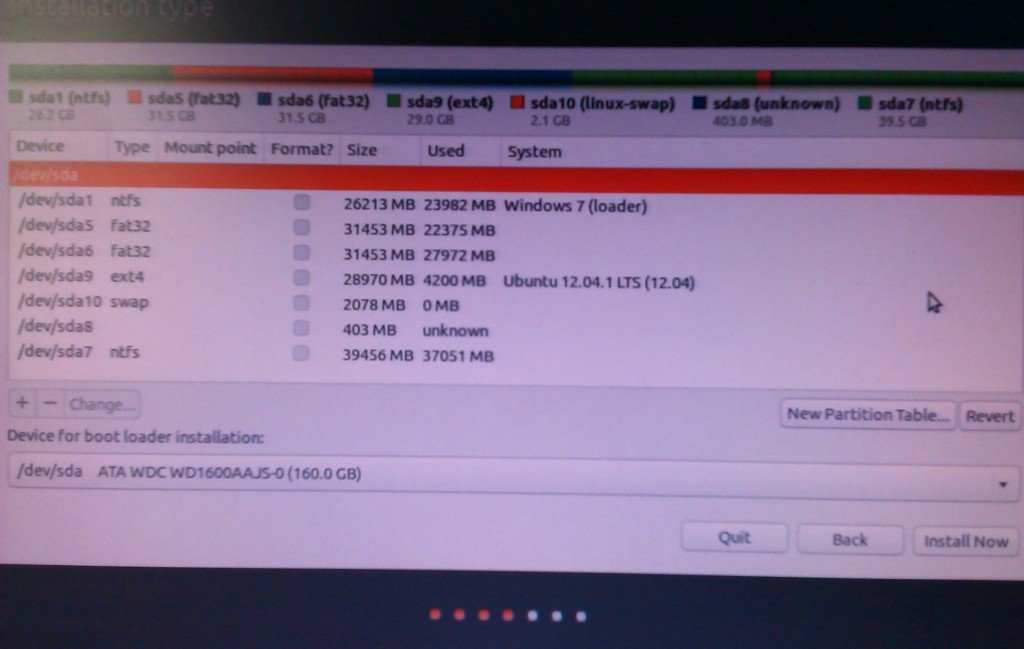
On the next screen, you would be shown the entire partition table of your HDD. The HDD itself named by Ubuntu as /dev/sda and all partitions are named sequentially as sda1, sda2, etc. As the Windows system uses FAT32 and NTFS file systems, you can easily understand which are your Windows drives are. If you still not sure which are your Windows drives, match the sizes that you wrote down in Step 1.
Step 7:
Select a partition where you want Ubuntu to be installed and click Change.

Step 8:
In the EDIT PARTITION window put the desired size of your partition, it would default with the existing size.
Select: USE AS – Ext 4 file system
Check the ‘format the partition’ checkbox.
Select Mount Point as “/” from the drop down.
Press OK.
If you want to create a swap partition, reduce the size of your swap partition and put it in the size text box. 500MB to 1GB should be fine for a swap partition.

Step 9:
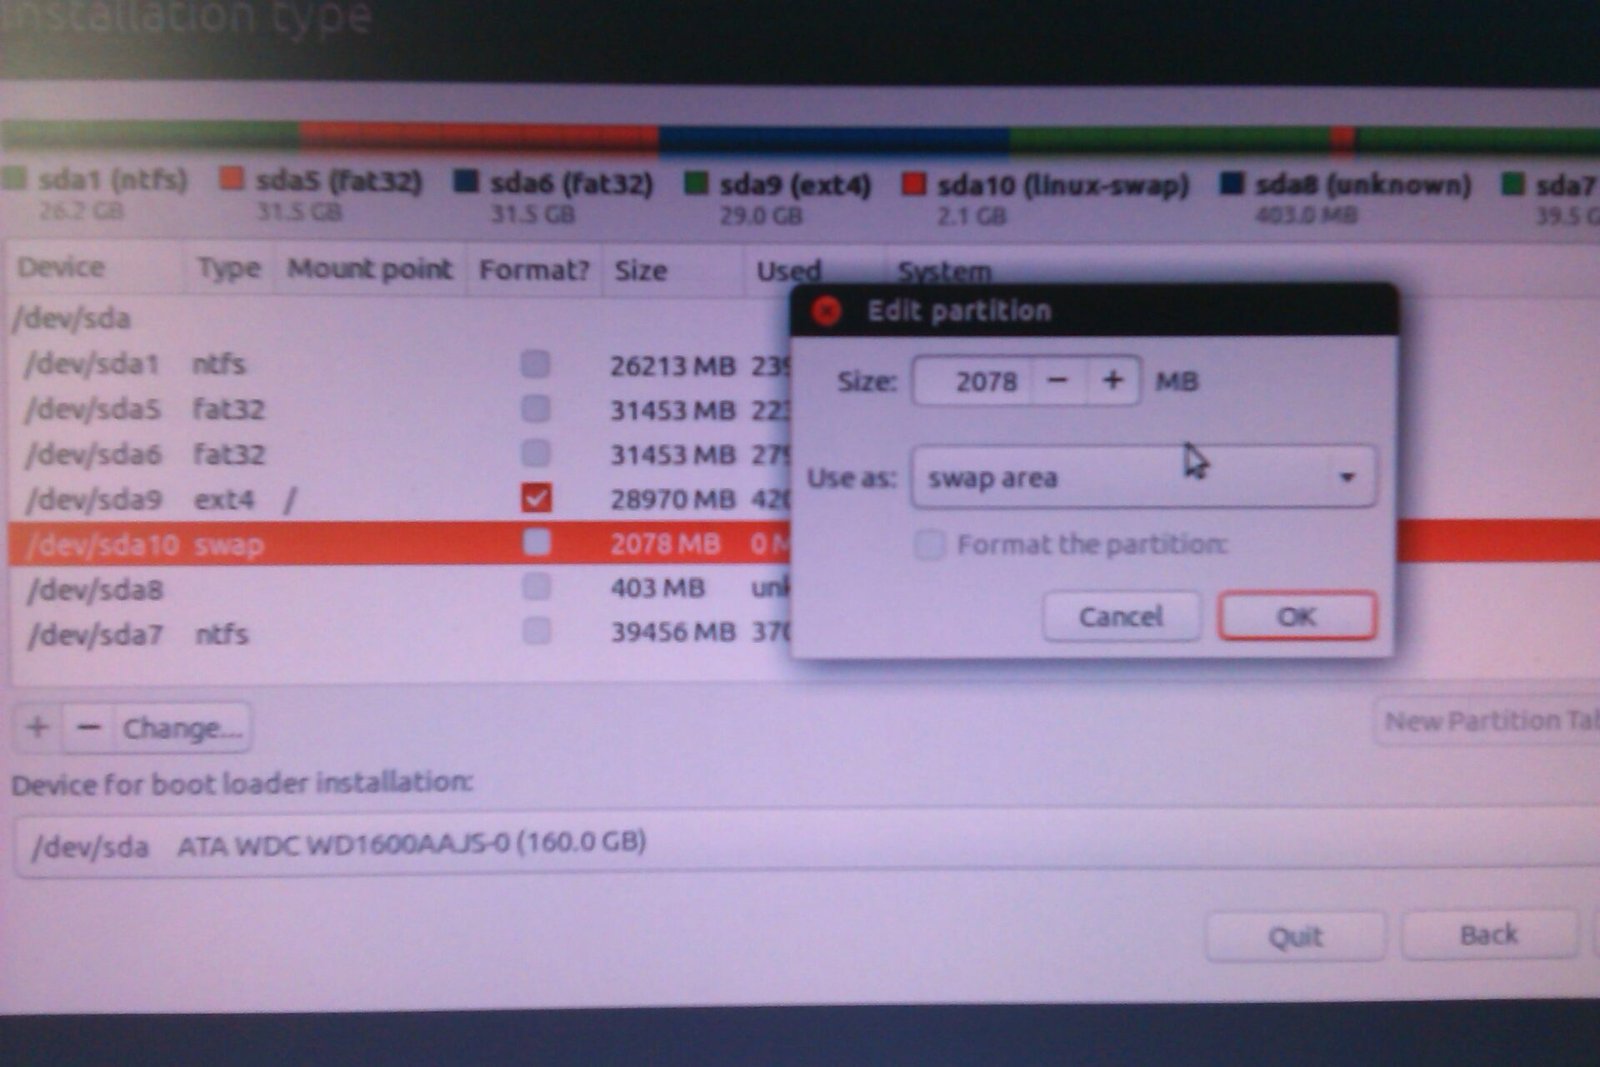
If you want to create a swap partition, select the unused spaces (usually shown as ‘unknown’ and click change.
Put the size that you reduced in the Size text box.
Select: Use as ‘Swap Area’
Press OK.
Step 10:
If you made it this far, your screen should look similar to this –
Press Continue.

Step 11:
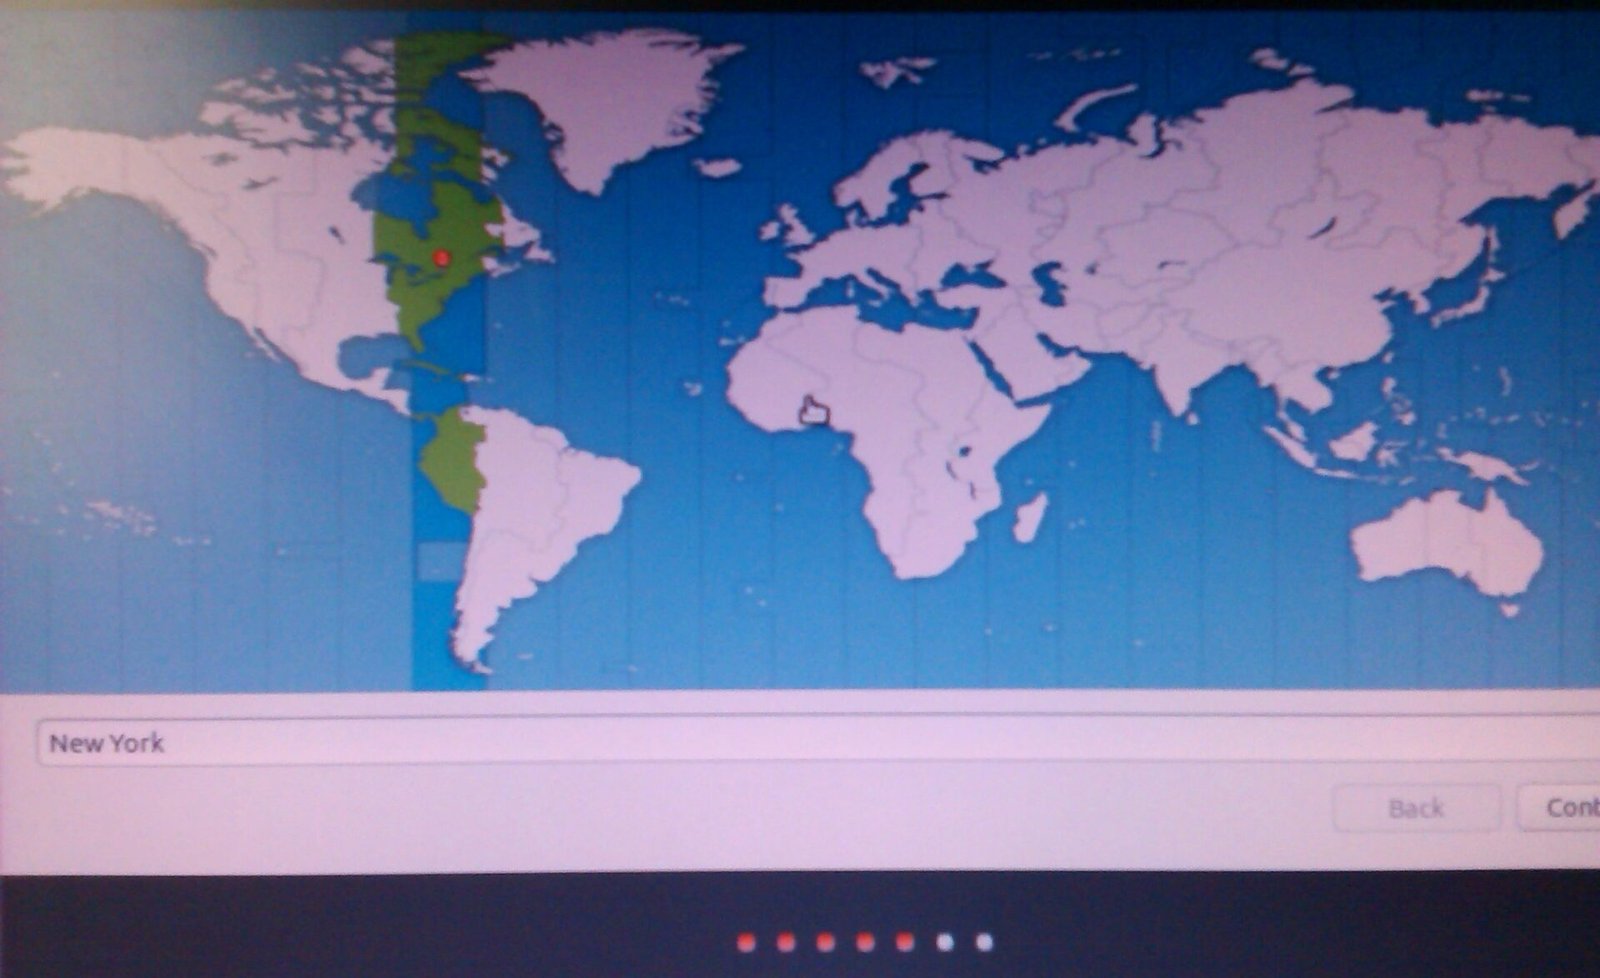
Your installation should be started and you would see the world map. Point using mouse your location, it would auto-detect based on your click, choose a location.
Press Continue.
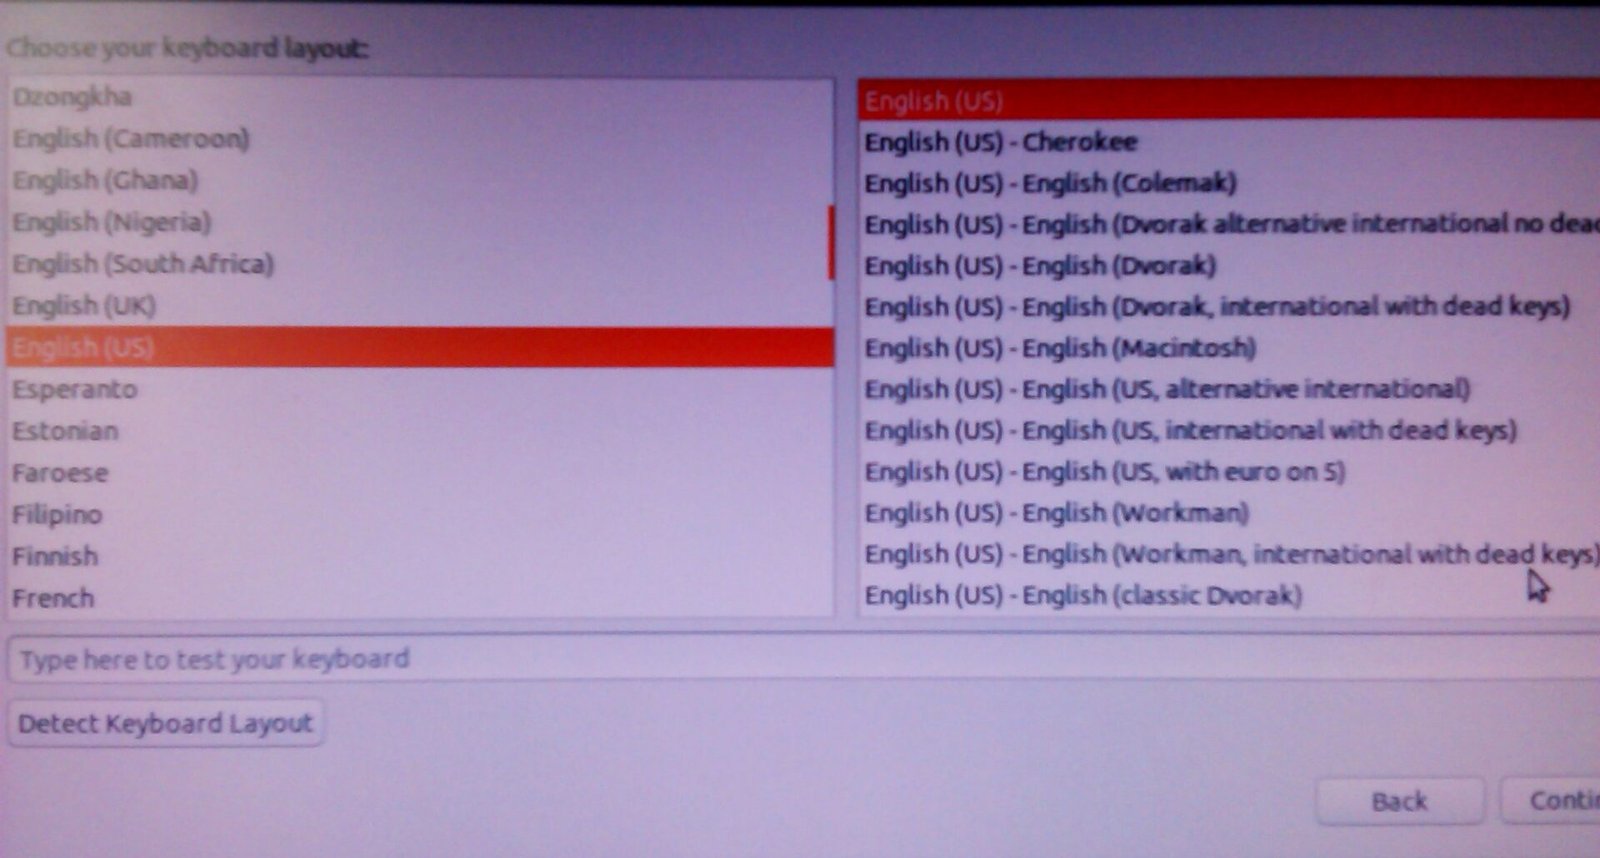
Step 12:
Choose your desired keyboard layout and language. Press continue.
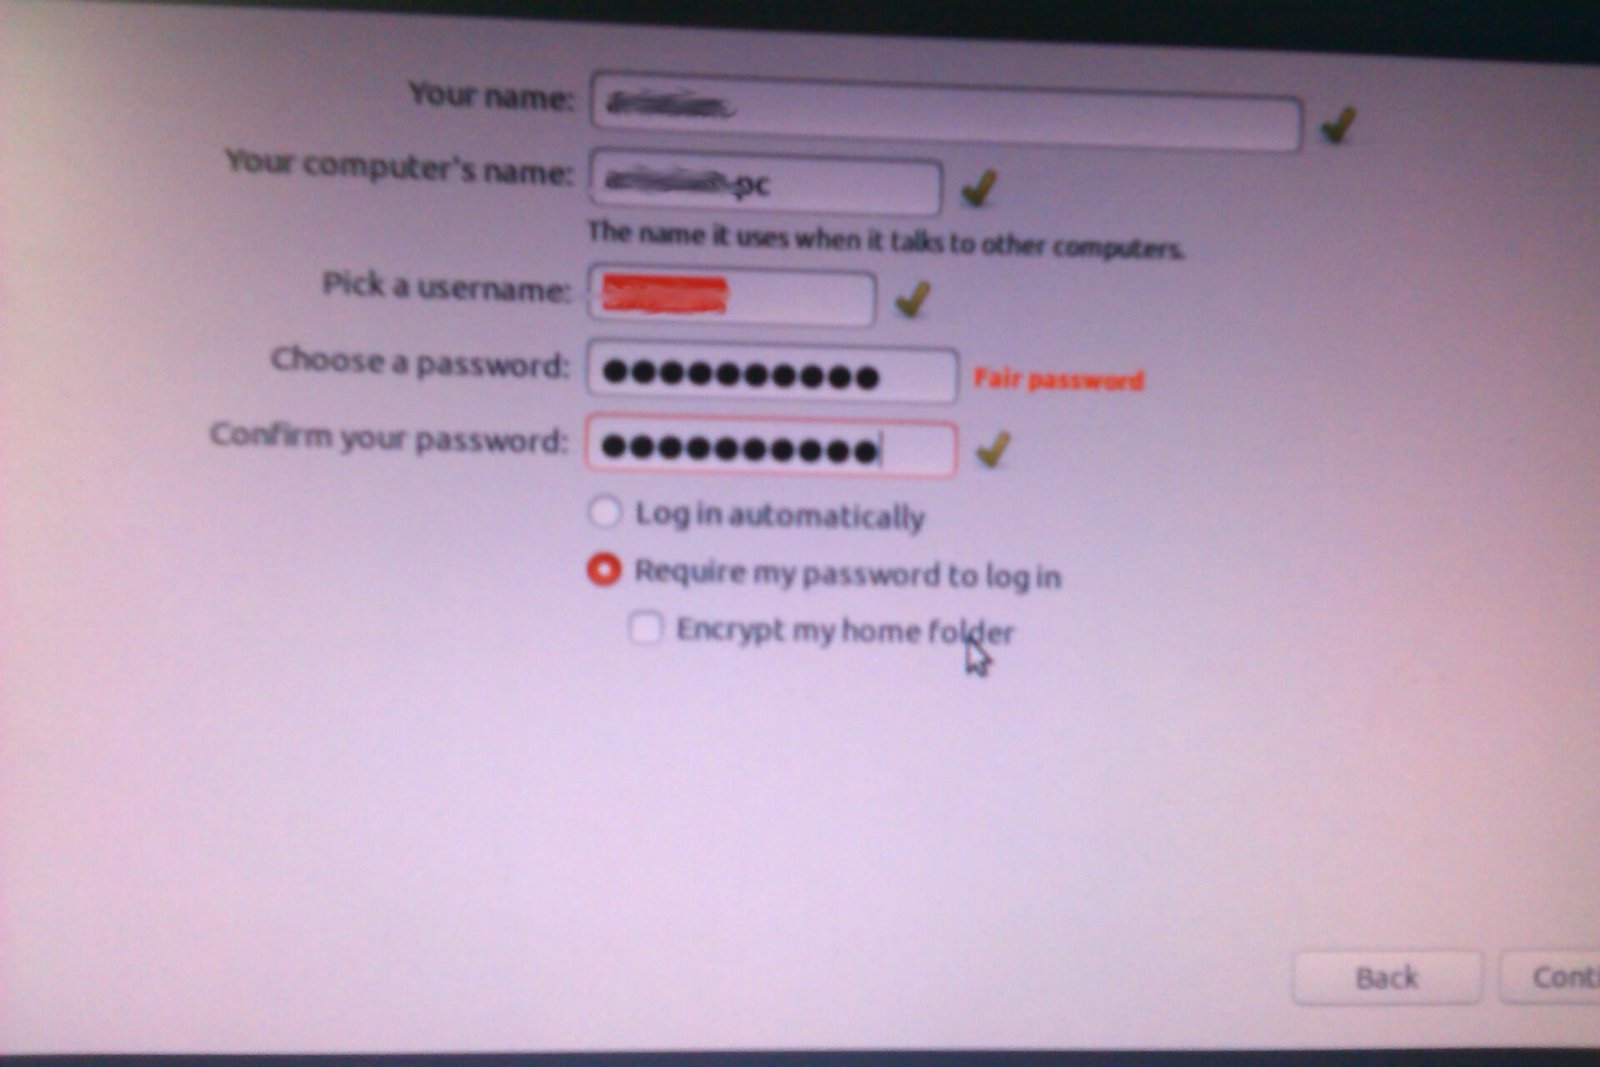
Step 13:
On the next screen, provide your name, computer name and user name, and a password. This user name and password would be needed while logging into Ubuntu after installation is complete.
Note: The user also would be assigned as administrator user and the password you provide here would be used to perform tasks that need admin privileges.
Press Continue.
Step 14:
Your installation would start. Please wait until it finishes. Typically it would take around 10 to 15 minutes depending on your system.
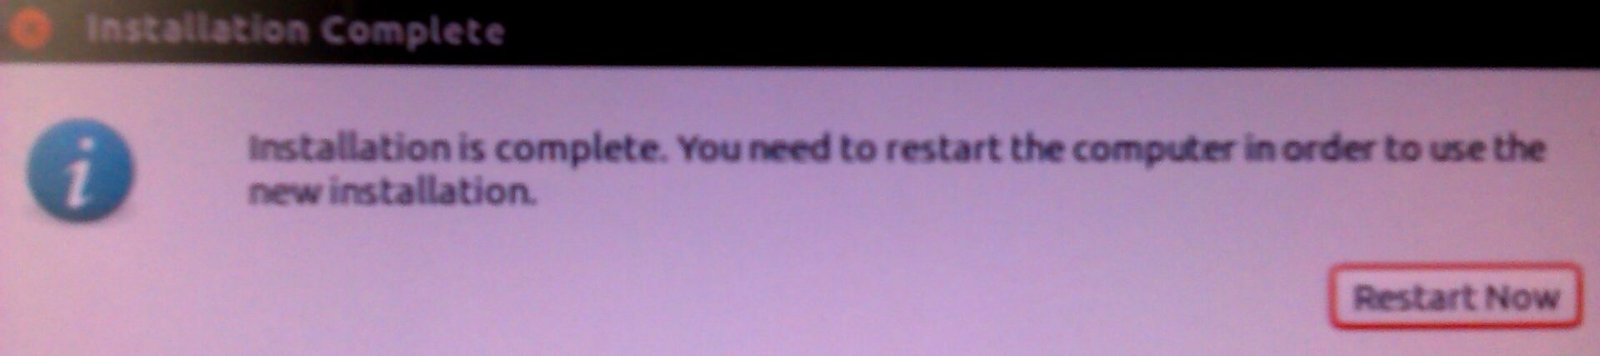
Step 15:
When the installation is complete, it would show you the message. Click Restart Now.
During the restart process, the disk drive should eject, remove the disk; You should also remove the USB stick.
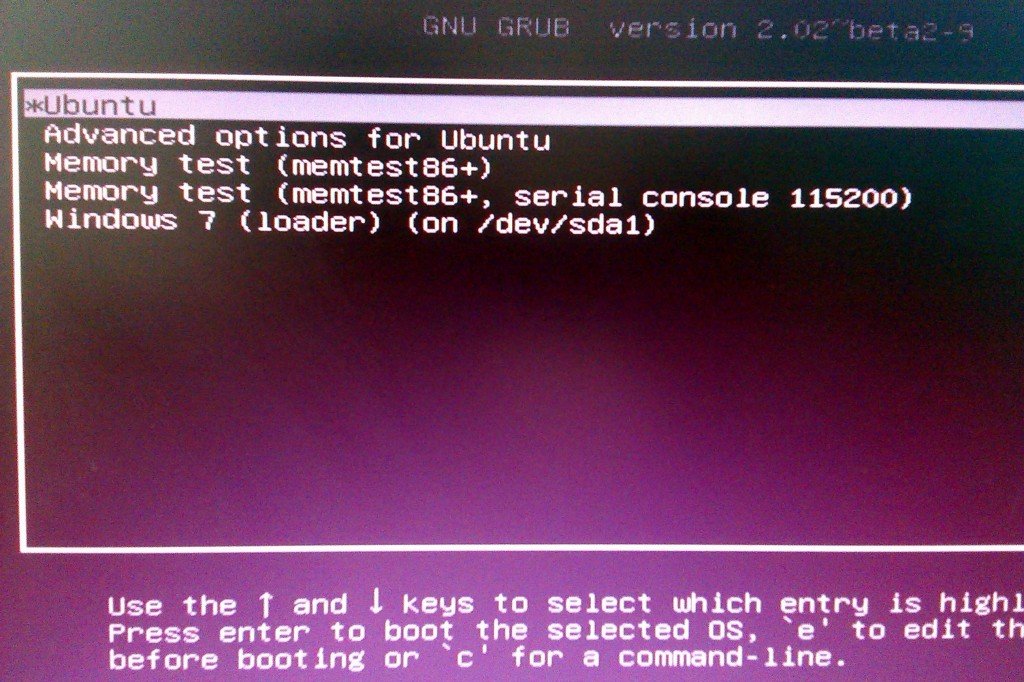
Step 16:
If everything works fine, you would see GRUB loader with both Windows and Ubuntu in the menu.
Choose your desire OS and go!
I hope this detailed description helped you to set up Ubuntu as a dual boot in Windows 7.


