If you love KDE and Arch Linux, this guide is for you. This guide explains the steps needed to set up a fully functioning KDE Plasma desktop with all of its native applications.
Let’s take a look at how you can install KDE Plasma in Arch Linux.
In the earlier posts, we explained that you could set up a bare minimum Arch Linux with an automated archinstall script and also explained how you can install GNOME, LXQt, and Xfce desktop Arch Linux. And now, we explain the steps for the KDE Plasma desktop.
Table of Contents
KDE Plasma desktop
KDE Plasma is a lightweight and visually appealing desktop environment for Linux that comes with tons of customization options at a very detailed level. The latest iteration of this desktop is Plasma 5, which is based on Qt5, KDE Framework 5 provides both Xorg and Wayland display server options.
The current KDE Plasma desktop version is 5.26 stable, which this article uses for installation.
This guide requires that you install the bare minimum Arch Linux shell already. If not, then follow this simple guide to install a basic skeleton of Arch Linux. Then continue with the following steps.
Also, ensure you have admin privileges with your user for running the pacman package manager.
Install and Configure KDE Plasma Desktop in Arch Linux
You need the following packages for a fully functional KDE Plasma system in Arch Linux.
- plasma (~590 mb) – basic plasma packages
- kde-applications (~800 mb) – additional KDE native applications (Konsole, etc)
- xorg – display server
- sddm – display manager
These four packages are necessary. However, you can optionally install plasma-wayland-session if you want to use the Wayland display server.
1. Install packages
Open a terminal and run the following command to install those packages.
pacman -S --needed xorg sddm
pacman -S --needed plasma kde-applications
When asked to select a package, press enter for default selection. If you are unsure, choose the following options when asked on the screen.
pipewire-media-session
phonon-qt5-gstreamer
pyside2
cronie
tesseract-data-eng (for english)
Wait for the installation to finish.
2. Enable display server and network
Now it’s time to enable the display manager and network; otherwise, you will not be able to log in. Run the following commands after the above commands are complete.
sudo systemctl enable sddm
sudo systemctl enable NetworkManager
3. Configure sddm and reboot
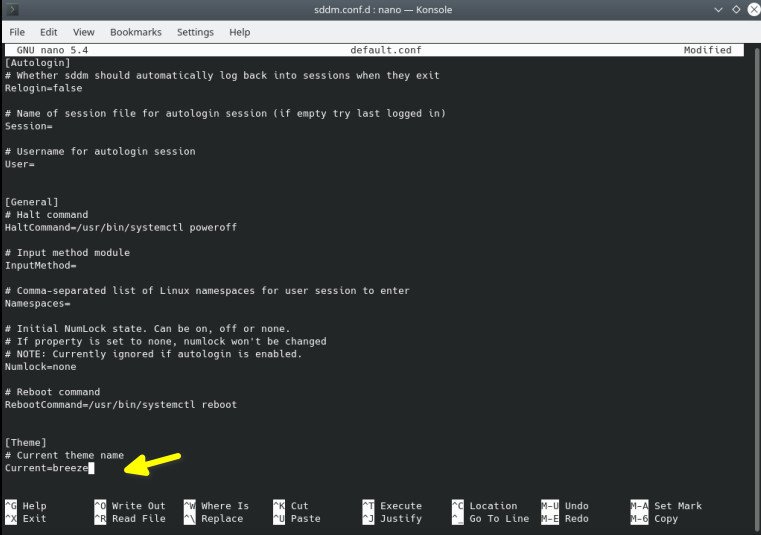
One last configuration you need for the KDE Plasma desktop is related to the login screen. By default, sddm uses its own failsafe login screen, which is not the typical KDE Plasma “breeze” login screen. A small tweak is needed for a KDE Plasma login screen.
Open the sddm.conf file from the terminal.
sudo nano /usr/lib/sddm/sddm.conf.d/default.conf
Change the theme section as per below.
[Theme]
# current theme name
 Current=breeze
Press CTRL+O and CTRL+X to save and exit the nano editor. Now you can restart your Arch system using the below command:
sudo systemctl reboot
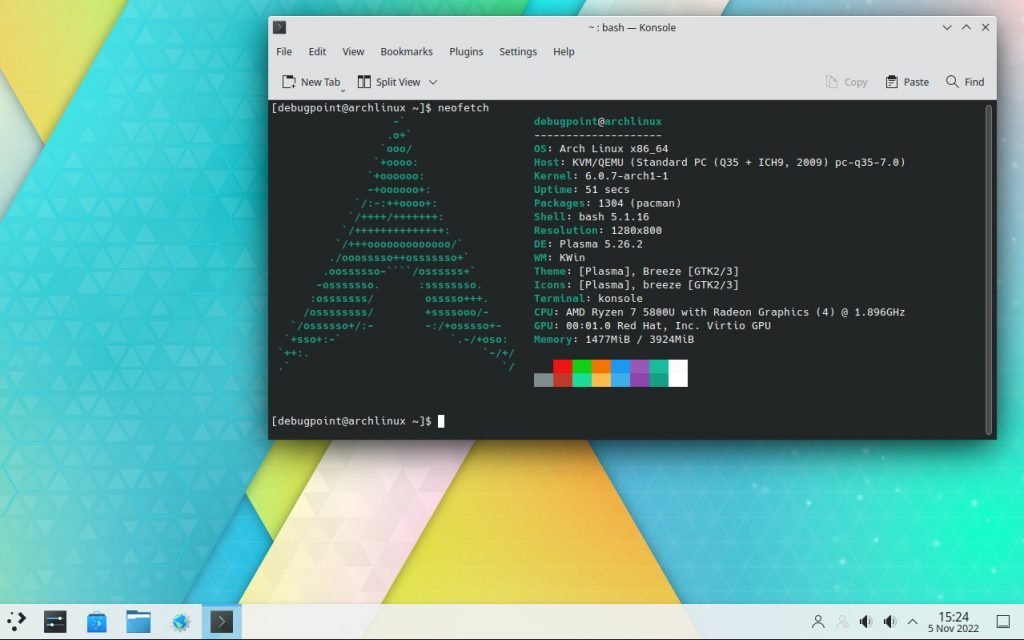
And you should be greeted with a nice KDE Plasma login screen and a desktop.
That wraps up the steps for KDE Plasma desktop installation in Arch Linux. I hope you get all the steps correctly and can install them. If you face any errors, comment below.
What’s next? You may want to check out other Arch Linux guides, Or browse the website for a more interesting read.


