A simple beginner’s tutorial on how to install Ubuntu in Oracle VirtualBox.
VirtualBox is software which allows you to try out several operating systems (Linux, Windows, BSD and so on) in your current Laptop/Desktop without actually installing them in hardware.
There are many software available such as virt-manager or GNOME Boxes. And VirtualBox is among them, which brings additional features.
This guide will teach you how to install Ubuntu in the latest VirtualBox.
Table of Contents
Things you need before installing
Firstly, you need VirtualBox software. To install it, follow our guide available in the below link(s). Choose the one suitable for you.
Secondly, download the current Ubuntu ISO image file from the official website. Or any version of Ubuntu ISO you need.
Thirdly, and most importantly, this tutorial would only work with Secure Boot disabled. With Secure boot enabled, this tutorial likely won’t work. If you want to disable secure boot, login to BIOS (by pressing F2 or other keys for your Laptop) and disable it.
That’s sufficient to get you started.
Note: This tutorial is made in the latest VirtualBox (7.0+). The steps might differ if you use an older version of VirtualBox (6+) because the latest VirtualBox 7+ GUI is changed significantly. However, I would recommend you follow the latest version, i.e. 7+.
Install Ubuntu in VirtualBox
Setting up
- Open VirtualBox from the application menu. Click on NEW.

- In the next window, select the followings.
- Choose a
name(whatever you want). - The folder should be selected as default in your home directory. Keep it the same. This is where the VM image will be created. You can choose a different location, such as an external SSD, etc.
- Choose the
ISOimage you downloaded for Ubuntu. - The type and version are usually selected based on the name. However, for Ubuntu, choose
Type=LinuxandVersion=Ubuntu 64-bit. - Select the unattended installation (click on the check box). If you uncheck this, a default user ID and password will be created by VirtualBox without user intervention. I would recommend you not to follow unattended installation.
- Choose a
There might be cases when the “skip unattended installation” is disabled. Then you are literally stuck, and you need to go ahead with Virtualbox’s own id and password. I am not sure why this has been disabled for few cases and why it’s not sometimes. This might be a bug.
The default username is vboxuser and password is changeme.

- Next, click on Hardware. Select how much RAM and how much you want to allocate for your virtual machine. Remember, whatever you allocate, should be used when you are running Ubuntu virtual machine.
- I have used the bare minimum of 4 GB RAM (4×1024=4096 MB) and 4 CPU cores for this guide.

- In the Hard Disk section, choose the amount you want to allocate for your virtual machine. For Ubuntu, you can safely choose around 22 GB to 25 GB.
- Keep the Hard Disk file type as VDI. You can also choose other options if you want to use the same image in cross-VM apps.
- Make sure the “Pre-allocate full size” is unchecked. This would allow VirtualBox to allocate the disk space dynamically. And not allocate the entire 22 GB (in the below example) right away.
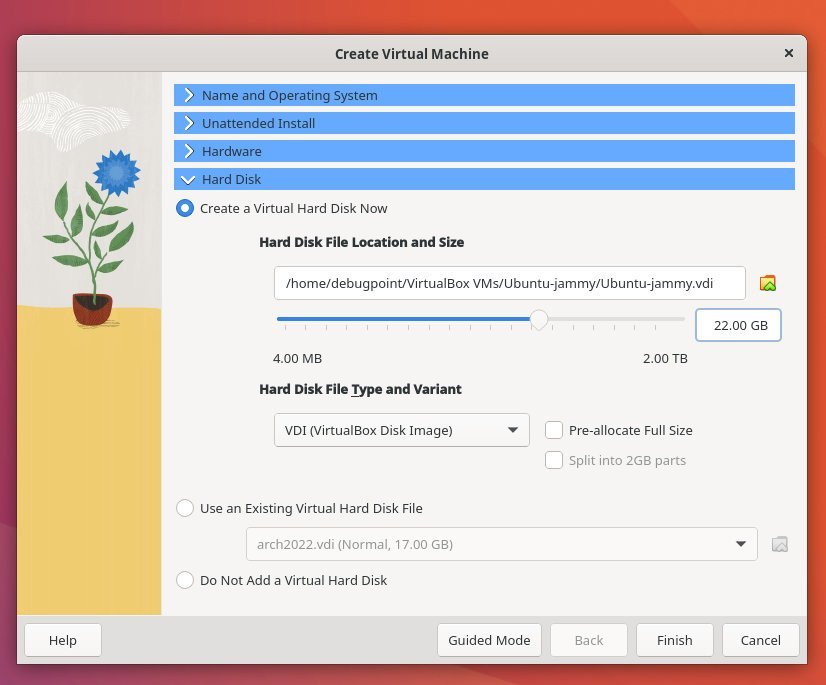
- Once done, click Finish.
Install
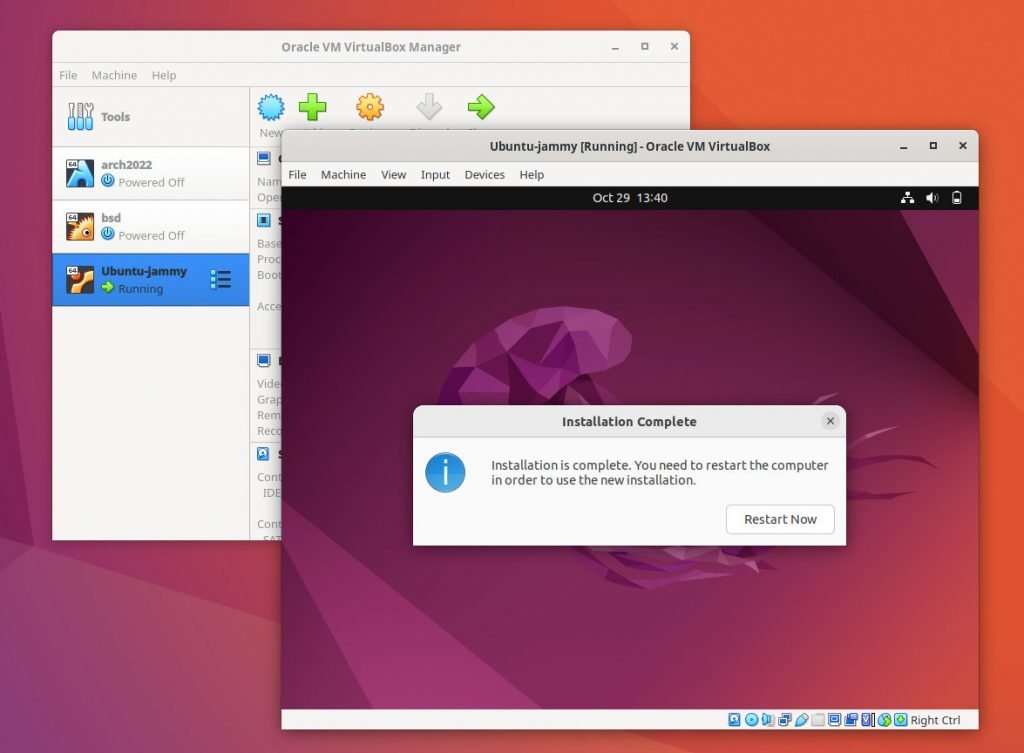
- Select the newly created VM at the left pane in the main VirtualBox window. And finally, click Start at the top toolbar. This action will kick-start the Ubuntu installation.

- If all goes well, you should see the Ubuntu installation prompt.

- From this point onward, follow the normal installation steps for Ubuntu. If all goes well, you should see Ubuntu Linux running inside VirtualBox.
Additional Tips for post-installation
- If you want to restart your VM or shut down your VM via the VirtualBox window, then right-click on the VM name. Then choose
ResetorClose > Power Off. - After you finish installing Ubuntu, make sure to install Guest additions. That would enable you to copy/paste between your host and guest machine.
- Enable bi-directional clipboard access, drag and drop using the
settings > General > Advanced. - Enable the option
View > Auto resize guest displayto make sure the resolutions are the same of your guest and host system.
Wrapping Up
In this guide, you learned how to create a simple Ubuntu Virtual machine using VirtualBox. Also, you learned to tweak several settings.
Finally, I hope this helps you and do let me know in the comment box if you have trouble installing Ubuntu.
Cheers.


