This article provides a step-by-step installation guide for the xmonad setup in Arch Linux with a custom pre-configured script.
Table of Contents
What is XMonad
The xmonad is a dynamic tiling window manager for the X Window system written in Haskell programming language. It is famous for its window automation, stability, minimal workspace features, and more unique features. With features like – multiple display support, auto window tiling management, quick keyboard navigation, and extension support, this window manager is one of the popular choices for those users who wants a productive and faster working system.
You can learn more about this window manager at https://xmonad.org/.
XMomad Setup in Arch Linux
How to Install
This guide assumes that you have a functional Arch Linux system ready to follow the below steps. If you want to install Arch Linux, then you can follow our guides as below:
For this guide, we will use Axarva’s pre-configured xmonad script, which comes with xmonad, Eww (Elkowars Wacky Widgets is a standalone widget system made in Rust), rofi (window switcher), tint2 (panels and taskbar) and some cool widgets. This guide is only for physical systems and not virtual machines.
Using this personal script is best for novice Arch Linux users because it is unnecessary to go through the hassles of choosing and installing each of the above components and configure them separately.
- Ensure you are logged on to the Arch Linux system as an admin user (preferable). And connected to the internet.
- In the terminal prompt, install the following components while in the home directory.
sudo pacman -Syu base-devel git nano
- Wait for the download to complete. Then clone the following Axarva’s repo from GitHub.
git clone https://github.com/Axarva/dotfiles-2.0.git
- After the above command is complete, browse to the dotfiles-2.0 directory. Here you should see a script –
install-on-arch.sh. Give the execute permission on this script and run. All these you can do with the below set of commands.
cd ./dotfiles-2.0
chmod +x ./install-on-arch.sh
./install-on-arch.sh
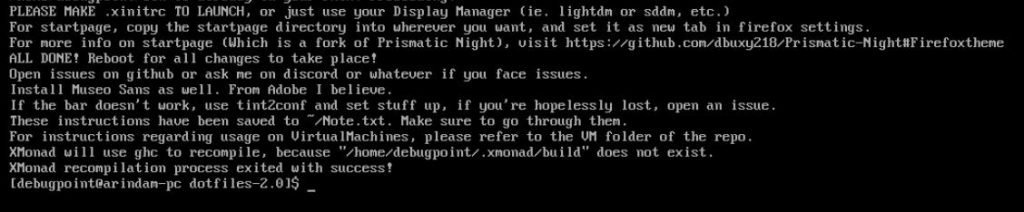
The above script will take some time to complete. It will download all the required packages for xmonad setup in Arch Linux. And at the end, the script will compile the entire source code that you downloaded in the first step, including xmonad and other additional utilities.
While executing, it would ask for input from you for some cases. Enter the values as per your system configuration and your preferences.
The script will ask whether your video card type is Intel, Nvidia, etc. Choose the correct option for your system. Also, when asked for the system resolution, choose the appropriate one. If you are not sure, choose the lower resolution option.

Choose yay (recommended). You can also choose paru if you wish. The installation of paru would take additional time due to rust download and setup. In that comparison, yay is faster and requires less time to install. An AUR (Arch User Repo) helper is also needed to compile some packages.

Congratulations if you reached this far. It’s time for some configuration. Once the installation is complete, you should see the below prompt.
Configuring XMonad
Installing the xmonad window manager is not sufficient. You have to tell the Arch system where it should pick the executables and widgets.
Also, you have to manually configure to tell X Windows server to execute the main xmonad binary. When you use a stacking window system (such as GNOME, KDE Plasma, etc.), the display manager (such as lightdm) takes care of this.
- Open the
~/.bashrcfile from the terminal prompt and append the $HOME/bin.

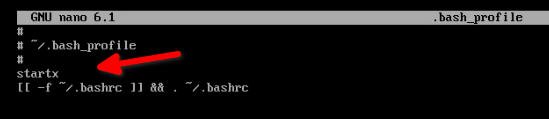
- Open the
~/.bash_profilefile and add startx at the beginning to start the xserver when logging in. Save and exit from the file.
- Open
~/.xinitrcfile and addexec xmonad. This file is new. Save the file once you add the command.

- The steps are almost complete, open the
~/dotfiles-2.0/.config/alacritty.ymlfile and change the font size for the terminal to something larger than the default value of 9. This is an optional step, but it’s better to change this. Save and close the file.
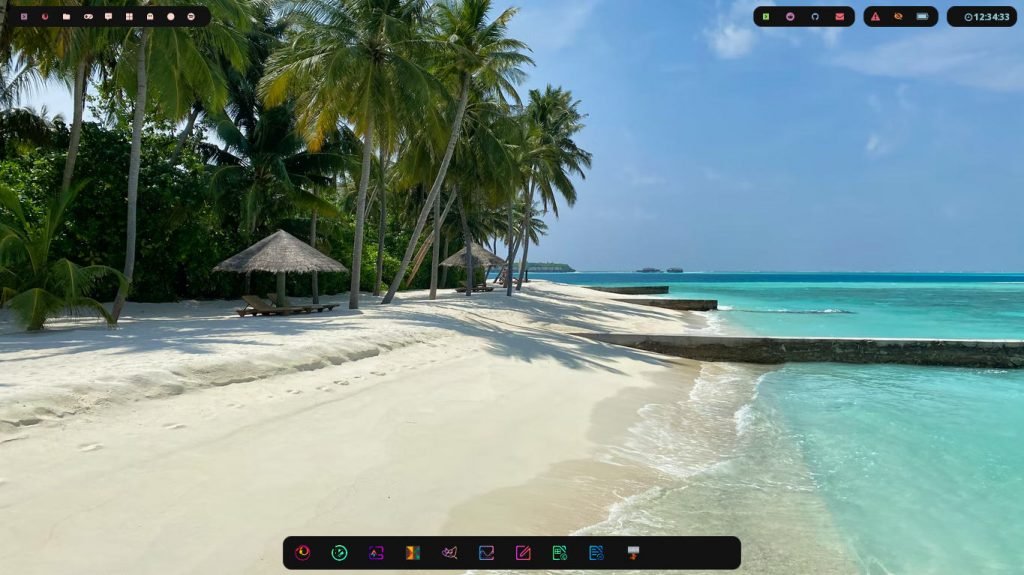
- Exit and log in again. And if all goes well, you should see a default xmonad desktop as below. If you want to configure further such as installing applications and other steps, proceed to the next step.

Configure the desktop
The default install in this process gives you a basic setup without the necessary applications to perform day-to-day tasks.
I have compiled a list of famous and essential software for this setup exclusively for you. This step is optional, and you can install something else as you wish. However, you can install it using the command that follows this list.
- Ristretto – Image viewer
- Feh – for changing wallpaper
- Firefox – Web Browser
- Gimp – Image processing and editor
- leafpad – simple text editor
- Thunar – File manager
- KSnip – Screenshot tool
pacman -S gtklib firefox leafpad libreoffice thunar ksnip ristretto gimp feh gvfs polkit-gnome
The gvfs and polkit-gnome packages are for Thunar and detect USB drives.
Once the applications are installed, you can add them to the bottom panel using the tint2conf utility. Using this utility, you can also change other desktop components, which you can figure out as you start using it.
Open a terminal by Meta + Shift + Enter key combination. Meta key is the Windows key in your keyboard in general. Then type tint2conf and configure the panel.
You can also download a nice wallpaper and set it up using feh.
Being a tiling window manager, most of the activities you need to perform via keyboard combinations.
Here’s a quick reference for you (via github)
| Keybind | Function |
|---|---|
| Meta + Shift + Enter | Launch terminal (alacritty) |
| Meta + Shift + C | Close window |
| Win + O | Open rofi menu |
| Win + Shift + Q | Open rofi powermenu |
| Win + S | Open sidebar |
| Win + Shift + S | Close sidebar |
| Win + P | Open dashboard |
| Win + Shift + P | Close dashboard |
| Win + B | Toggle the main bars |
| Win + Z | Activate inhibitor (Stops autolocking) |
| Win + Shift + Z | Dectivate inhibitor (Enables autolocking) |
| Win + Ctrl + G | Toggle gaps (toggle to get screen space) |
| Win + J | Navigate through windows |
| Win + K | Navigate through windows |
| Win + Space | Switch through layouts |
| Win + T | Make a floating window tiled |
Performance
These configurations and scripts mean nothing if performance is not up to the mark. So, I thought of testing the performance of the xmonad setup in Arch Linux.
My older test machine (i3, 4GB RAM, SSD, NVIDIA 340) performs fairly. I felt some performance lag, primarily because of the NVIDIA 340 driver, which is unavailable in the Arch repo. But I am sure it would perform much faster if you tested it in newer hardware.
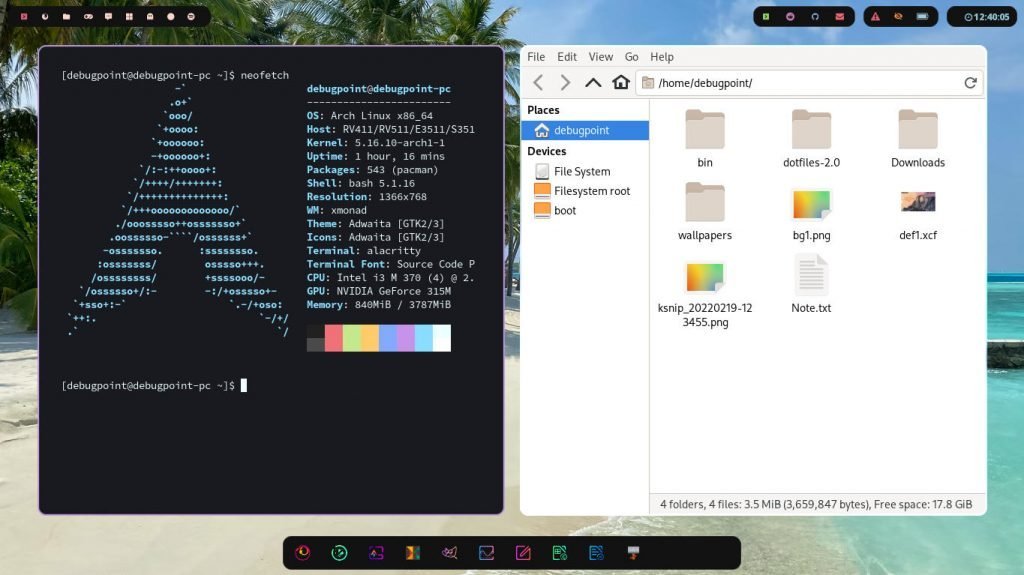
That said, it consumed approximately 820 MB of RAM and CPU during idle state at 10% to 13%. Surprisingly it’s a little higher in my test for an idle state.
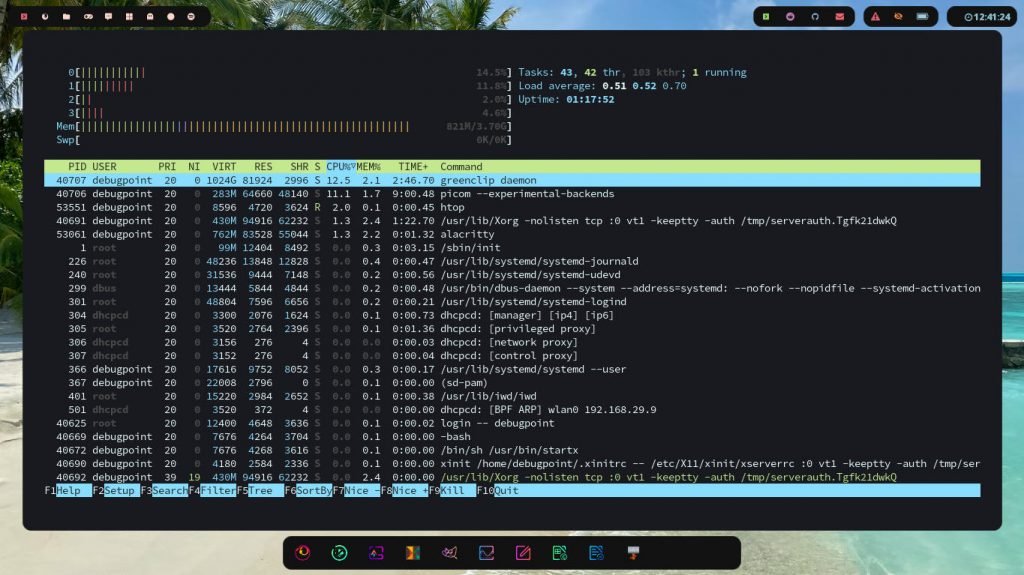
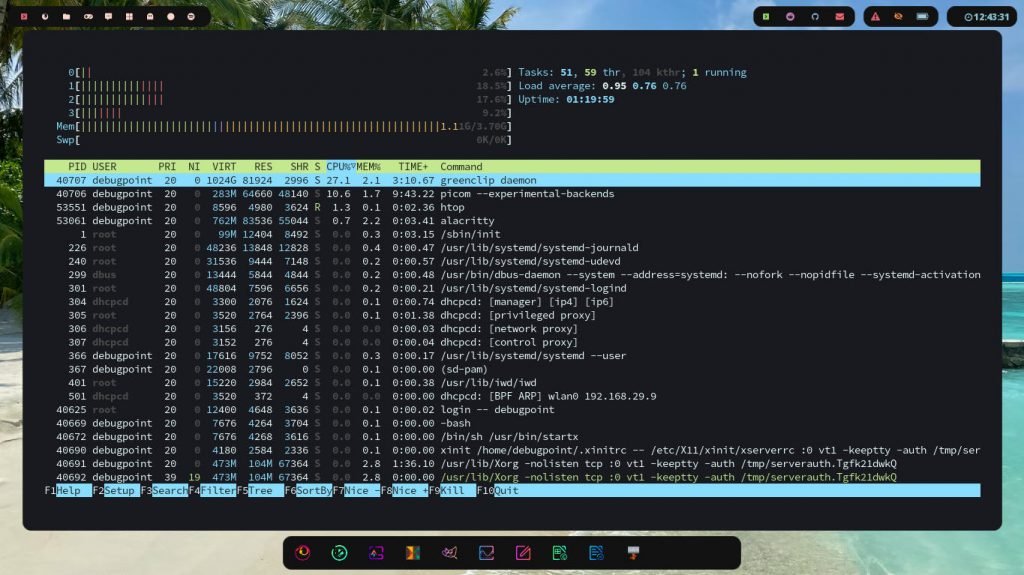
With that idle state metrics, I was curious about the heavy workload. So, I opened Firefox (1 tab), GIMP, Thunar, Text editor and Screenshot tool. The memory consumption shot up to 1.1 GB, and the CPU is average at 20%.
Overall, I think it’s using a little more resources, although it was supposed to consume less because it’s a window manager. Probably I need to test it in newer hardware.
Enjoy your xmonad setup with Arch Linux!
Closing Notes
The xmonad is undoubtedly one of the beautiful window managers when adequately configured with several widgets. You can go ahead and try it in a physical system if you love window managers. And when appropriately configured, you can easily use it for your daily driver.
With that said, I hope this guide helps you to set up your xmonad window manager in Arch Linux. If you have any questions, let me know in the comment box below.
Cheers.


